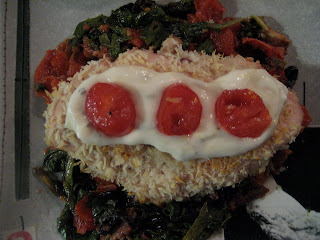
Thursday, October 28, 2010

Long Time No Cook...

For a second there, I thought I was going to have to change the name of my blog to "Little Queens Kitchen." We moved last month, and the process was, as always, harrowing. We met with sleazy brokers, saw lots and lots and lots of tiny basement apartments, raised our price limit, expanded our search to other boroughs, and finally ended up in an apartment way out in...Brooklyn. Hurrah. Because partway through the searching we realized that we are just not Queens people. We have roots in Brooklyn, and they run deep.

After the apartment hunting was done, of course, we had to deal with actually moving. And while we hired actual movers this time (Yay! We're adults!) doing that combined with starting school and working was just exhausting. But now here we are, settled in, with my favorite dancing lady lamp finally in a place of honor on the kitchen table. And I am getting back to cooking.

Perhaps my least favorite part of the moving experience is the disruption of routine, specifically in the kitchen. At some point you have to pack your pots and pans, and from that point until everything finds a place in your new home, cooking is pretty much on the back burner. We ate take out, sandwiches, cereal and yogurt, and various other convenience foods for what seemed like forever. Meanwhile, though, we explored our new neighborhood and figured out where to shop, played with the new oven, and finally made a functional kitchen. Ever since, I've been making up for lost time. French onion soup, pizza, roasted veggies...it's good to be back.

Unfortunately, I haven't taken any pictures. So this recipe is from the glory days, over the summer, when I had little to do and lots of time. It's my favorite summer pizza, packed with all the best flavors of the season. And there's salad on top, so it's healthy! You could make it with apples or pears and spinach instead of arugula to make it a fall pizza.


Pizza with Plums, Prosciutto, Gorgonzola, Balsamic and Arugula
adapted from Bon Appetit

1 1-pound package purchased pizza dough (I make my own, usually from Mark Bittman's How to Cook Everything)
2 cups Gorgonzola cheese, crumbled (about 8 ounces)*
3-4 plums, pitted and cut into wedges (the recipe calls for figs, I use plums when I can't get fresh figs)
2 tablespoons fig balsamic vinegar, divided
8 thin slices prosciutto
1 tablespoon extra virgin olive oil
8 cups arugula

Preheat oven to 450*. Role out dough on an upside down cookie sheet to a 12" x 10" rectangle. Sprinkle Gorgonzola over dough. Sprinkle with pepper. Place plums in a medium bowl, drizzle with 1 tablespoon vinegar and set aside.

Bake pizza until crust is golden brown on the bottom, 15-20 minutes. Immediately drape prosciutto slices over, covering entire pizza. Arrange plums on top of prosciutto, and cook until just warmed, 1-2 minutes. Whisk remaining vinegar and olive oil in a large bowl, add arugula. Toss, sprinkle with salt and pepper. Mound salad atop pizza, cut into slices and serve.

*I measured the Gorgonzola for the first time the last time I made this, and it was a bit much. I'd recommend 1-1 1/2 cups instead of 2.

Monday, September 6, 2010

Missed Opportunities

Every summer, I swear I am going to take full advantage of all the opportunities of the season. The days are long, and despite the heat I love the idea of carefree evenings filled with outdoor movies, drinks outside, and the impromptu sidewalk jazz concerts (ok, that last one only happened once, but it was still awesome). The key phrase there was "despite the heat." Although secretly I want to be that person with just a dewy glow while carrying out various activities in all the humidity, I am really a crazy sweat ball and often forgo events because it is just too darned hot in this city. I usually manage to attend several carefully selected summertime-only events: symphony/opera in the park, Bastille day, and perhaps a movie outside. The rest of the time I prefer a more air conditioned existence, choosing indoor seating over the patio and madly fanning myself until my sweat beads evaporate. Inevitably, when fall rolls around I look back on the summer with rose colored glasses and berate myself for not making just a little bit more effort. I wax nostalgic about the still summer nights, the air heavy and full of potential.

Inevitably the air turns cooler, and I become more motivated. And my only remaining regrets have to do with produce. Summer is so abundant in this area that I can't possibly use it all. I walk the aisles with eyes wide open, breath slightly held, packing as much produce into my tiny cart as I think I can possibly eat in one week. As much as I try, I always miss something. This year it was garlic scapes. I love those things! I saw them in passing a few times at the store, but not when I was in the experimenting mood. By the time I was ready to buy they were long gone. I also missed fresh garlic, spring onions, and blueberries.

I actually ate a lot of blueberries this summer, but all in the "enjoy these beautiful orbs in their most natural form" way. Prior to the summer start I thought we might make our way to a "U Pick" blueberry patch and purchase enough to make jam, bake endless muffins, and perhaps freeze some for the winter. Sadly, we never made it. Plus, by the time I located the recipe I clipped three years ago to make for DP, local blueberries were no longer in stock at my grocery store.

Not to be deterred, I grabbed some frozen blueberries and headed home. And I made what is easily the best summer desert I have ever made. First, I've never made a shortbread from scratch and was pleased to discover that it's actually easy. Second, the little bits of ginger made the whole thing sing. And third, the frozen blueberries worked just fine. They reminded me that even in winter, when I am looking back on all of summer's missed opportunities, I'll be able to whip up a little bit of summer (before I head out with my sled to take advantage of the snow!).


Gingered Blueberry Shortcake
from Cooking Light

4 cups blueberries
3 tablespoons sugar
1 tablespoon lime juice
2 cups all purpose flour
1 tablespoon baking powder
1/2 teaspoon salt
6 tablespoons chilled butter, cut into small pieces
3 tablespoons minced crystallized ginger
3/4 cups 2% milk
1 large egg white
1 tablespoon water
1 tablespoon turbinado sugar
1/3 cup heavy whipping cream
2 teaspoons powdered sugar, or to taste

Preheat oven to 400F.

Combine first three ingredients in a saucepan over medium-low heat, cook 3 minutes or until sugar is dissolved, stirring frequently. Set aside.

Place flour, baking powder, and salt in the bowl of a food processor; pulse 3 times to combine. Add butter and ginger; pulse until mixture resembles coarse meal. Place mixture in a large bowl, add milk and stir until just moist. Turn mixture out onto lightly floured surface, press into 7-inch circle. Cut into 8 wedges and place each 1 inch apart on baking sheet. Combined egg white and water in a small bowl. Brush wedges with egg mixture, sprinkle with turbinado sugar. Bake at 400F for 20 minutes or until golden brown. Cool.

Place cream and sugar in a medium bowl. Use an electronic or wire whisk to beat cream until you get to your desired consistency. Split shortcakes in half horizontally. Spoon 1/3 cup blueberries over bottom half, top with 1 1/2 tablespoon whipped cream and top half of shortcake. Eat. Yum.

Wednesday, August 25, 2010

Favorites

DP has decided that our children will never have the chance to be picky, because I seldom make the same thing for dinner twice. Since I decided to learn to cook 8 years ago, my collection of cookbooks has grown to more than 20, and I have 4 binders stuffed with all the recipes I have pulled out of magazines to try. Recently I implemented a "one in, one out" policy (toss one recipe for each one I add) but that hasn't kept me from cramming extra pages into the side pockets of the binders. In addition, since I discovered food blogs I've learned how to bookmark recipes in my internet browser for future reference. I now have over 100 saved. I would like to try for a tiny bit more organization to help on those occasions that we like something so much we want it again, but for the most part I like the variety of trying something new almost every time I cook.

I have never been one to have a "favorite" something. Favorite color, meal, band, TV show--I generally don't get attached enough to things to call them my favorite. Occasionally, though, we like a meal so much that it makes a repeat appearance (sometimes the next day--like the Fried Green Tomato BLTs). More occasionally, the meal is so good, and so satisfying that it finds itself in a somewhat regular rotation. There's the "sick soup" (chicken and rosemary dumplings, made when one of us is sick), our favorite pizza, and this salad. It was the first recipe I made from the first food blog I ever discovered, The Kitchen Sink. The creamy, healthy dressing is regularly made for everything from fish tacos to cabbage salad. I think I like it best with the original salad, which I have now made so many times I think I can firmly call it a "favorite."

Crispy Black Bean Cake Salad
adapted from The Kitchen Sink (who adapted it from Food and Wine)

1 tablespoon + 2 teaspoons canola oil
1 small onion, diced
1 garlic clove, minced
1/2 teaspoon cumin
1/8 teaspoon cayenne
1 15-ounce can black beans, drained and rinsed
2/3 cup dried bread crumbs
salt and pepper
2 to 3 cups baby greens*
1/2 pint cherry tomatoes
3 scallions, sliced
1 avocado, peeled, pitted and sliced
2 limes, cut into wedges
*All salad ingredients and quantities are a matter of personal preference/what you have. Basically, put together the ingredients you would to make any salad.

Yogurt-Lime Dressing
1/3 cup plain non-fat greek yogurt
1 tablespoon dijon mustard
2 tablespoons lime juice
1 teaspoon cumin
salt and pepper to taste

In a medium skillet, heat 2 teaspoons canola oil. Add onion and garlic, cook over medium heat until softened, ~ 3 minutes. Add the cumin and cayenne, cook until fragrant, 1 minute. Place the onion mixture in the bowl of a food processor. Add about half the beans (3/4 cup, but I never measure) and pulse until the mixture is finely chopped. Scrape the mixture into a medium bowl, add the remaining black beans and 1/4 cup of breadcrumbs. Add salt and pepper to taste, mix thoroughly. Shape into six patties.

Place breadcrumbs into a shallow dish and dip each of the patties into the dish, pressing to get the breadcrumbs to stick.

Heat remaining 1 tablespoon of oil in the skillet until shimmering. Add the cakes and cook over medium-high heat until browned.

Meanwhile, mix all of the ingredients for the dressing in a large bowl. Add salad ingredients (except avocado), toss.** Divide between 2 plates.

Top salad with avocado and bean cakes, serve and enjoy!

**Alternately, as in the picture above, you could just drizzle the dressing over the assembled salad.

Saturday, August 21, 2010

Bait and Switch

DP and I are planning to move out of our place and into a (hopefully) larger, cheaper apartment in a little over a month. We are currently in the middle of navigating Brooklyn real estate, which has fortunately gotten a lot more reasonable in the last couple of years. Three years ago, looking for an apartment was horrifying. We laughed, we cried, we fought, and then we found ourselves in a beautiful little gem for exactly the right price. It's remembering that the gem is out there that is difficult.

No matter what the state of the market is, real estate agents love the "bait and switch." It's something I had forgotten about in the intervening years, but when we started the search all of the memories came flooding back. Here's how it goes (as I'm sure most people know): you find an apartment, perhaps on craigslist, that looks great. It is large, lots of light, nicely maintained, and the right price (all of which you can't totally tell from an ad, but you get an idea). You call to set up an appointment to see it, and one of two things happens. Either the agent is upfront with you and says that actually, that apartment is [no longer available, not showing yet, being converted into a yoga studio] but how about we show you this other apartment in the [wrong neighborhood/price range/move in date]. Or you show up for the appointment and the same thing happens. Or you show up and the apartment is in a "slightly" different location than you were told. Or, occasionally, it is exactly as represented. That's what we are looking for, and hopeful we will be able to find in the next couple of weeks. Hopefully sans tears/fights/frustration.

Today, after a full morning of appointments, we came home for brunch. There, I performed a little bait and switch of my own. I took a normal, healthy ingredient (heirloom tomatoes), and fried it. Then I served it up with bacon and arugula for a delicious sandwich that screamed of summer. It was a welcome break from the detox diet--although with the light batter and whole grain bread I might have a second batch tomorrow!


Fried Green Tomato BLT
from Food and Wine

4 slices bacon
1/2 cup all purpose flour
1 egg beaten with 1 tablespoon water
1/2 cup yellow cornmeal
salt and freshly ground pepper
1 pound unripe green tomatoes, cut into 1/2 inch slices (I used green zebra heirloom tomatoes)
canola oil
8 slices whole wheat/multigrain bread, toasted
mayonnaise (I used canola oil mayo)
arugula

Preheat oven to 400F. Line a rimmed baking sheet with foil, bake bacon on sheet until crisp, or 15 minutes. Drain the bacon and cut in half.

Put the flour, cornmeal, and egg in three separate shallow bowls. Season the cornmeal with salt and pepper. Dredge the tomato slices in flour, egg, and then cornmeal, tapping to remove excess.

In a large skillet, heat 1/4 inch canola oil until shimmery (or water sizzles when flicked in pan). Add tomatoes and cook until golden brown, around 5 minutes, turning once (it took me longer than 5 minutes to cook them until crisp). Drain tomatoes on paper towels.

Spread the toast with a thin layer of mayo. Layer with arugula, 2 halves of bacon, and tomatoes. Serve and enjoy!

Tuesday, August 17, 2010

Detox and Cake

As I said in a previous post, DP and I traveled a lot (for us) this summer. Starting in April and finishing in late July, we went to St. John, San Francisco, Cape Cod, Princeton, Philadelphia, and Los Angeles. Some of those places for just a night, some for longer, but either way by the time the end of July rolled around we felt a little bit of a mess. Housework neglected, freewheeling spending, many weeks of skipped grocery shopping and take out meals, "vacation" lifestyle...let's just say we needed to detox hard. And we are. We are well on our way--the house is looking a lot better, regular shopping and weeknight cooking have resumed, and the spending has been slightly curtailed. Oh, and the gym? We are rebuilding our friendship. Although if they don't fix the air conditioning we may resume our previous casual acquaintance status.

Since we are currently in the throws of eating nothing but sprouted bread, fruits and vegetables, cabbage salad, and other assorted healthy foods, I'm going to take a moment and reflect on cake. In my family the traditional birthday cake is cherry cake. Actually, my mother would argue that it was her special cake and that we all stole it from her. Either way, it's delicious. Flavored with maraschino cherry juice, the bright pink frosting is adorned with pecans and glistening artificially colored and flavored shells of fruit--we like to cram so much on it is difficult to find space for the candles. Friends who have been served the cake generally look at it first with an air of suspicion, then taste it, love it, and find themselves looking forward to it year after year.

So that's what I have on my birthday, but DP is an entirely different story. While she likes the cherry cake, she wants (and deserves) her own special cake. We haven't settled on an every year favorite yet, and this year she requested either a yellow cake or flourless chocolate. I opted to make a flourless chocolate cake (because I like chocolate better...yeah, I'm a gem). As previously mentioned, I am not a baker. This cake makes someone like me look like a whiz in the kitchen, and that I appreciate. It was also delicious, and I might be able to convince myself that its lack of flour makes it detox approved...

but most likely not. Oh well, my birthday is coming up in November.

Flourless Chocolate Cake (or La Bete Noire)
from Bon Appetit

Cake
1 cup water
3/4 cup sugar

9 tablespoons unsalted butter, diced
18 ounces bittersweet or semisweet chocolate, chopped (I used semisweet--next time I'd use bittersweet)
6 large eggs

Ganache
1 cup heavy whipping cream
8 ounces bittersweet or semisweet chocolate, chopped (same above note)

Whipped cream

Cake instructions:
Preheat oven to 350F. Butter a 10 inch cake pan (springform would be easier, but I used my silicone pan and it worked just fine). Line bottom of pan with parchment paper, butter parchment. Wrap 3 layers of tin foil around pan (I tried to do this, failed, and it was fine). Combine 1 cup water and sugar in a small saucepan, bring to a boil and stir until sugar dissolves. Simmer 5 minutes, remove from heat.

Melt butter in a large saucepan over low heat. Add chocolate and whisk until smooth. Whisk sugar syrup into chocolate, cool slightly (I cooled slightly more than slightly--I was afraid I'd end up with scrambled eggs mixed in with my cake). Add eggs to chocolate mixture and whisk until well blended. Pour batter into prepared pan. Place cake pan in large roasting pan, add enough water to come halfway up the sides of the pan.

Bake cake until center doesn't shake when jiggled, about 50 minutes. Remove cake pan from roasting pan and place on cooling rack. Cool completely in pan.

Ganache instructions:
Bring whipping cream to a simmer in a small saucepan, remove from heat. Add chocolate and whisk until smooth. Pour over cake still in pan. Refrigerate until ganache is set, ~2 hours.

Whipped cream:
Pour remaining whipping cream (1 cup from the 2 cup pint) in medium bowl. Add 1 tablespoon sugar (or to taste) and dash of flavored vinegar (I used pomegranate). Whisk your little heart out, until soft peaks form. You could use a mechanical whisker, but I really like to do it myself. Adjust sugar and vinegar--you are going for lightly sweetened.

Monday, August 9, 2010

Pancakes

I love pancakes. Actually, more broadly, I love brunch. By its very design, brunch is like giving yourself permission to slow down. It's a later in the day meal, shared with friends, meant to be lingered over, and often involves a drink. Friends, slowing down, and a well made drink--my favorite things. I love that in New York brunch is something you 'do,' and that in Brooklyn the relaxed pace makes it possible without an oppressively long wait. I love that it's a reliable fall-back idea: Can't think of what to do? Let's do brunch. I also really do love brunch food more than most other meals of the day. Eggs, omelets, frittatas, bacon, and pancakes. And I do love pancakes.

I actually consider pancakes a 'bridge' food. They aren't great for having friends over for brunch (standing at the stove making batches does not a happy hostess make) but they do require a certain amount of extra time to prepare and cook. I also don't, as a rule, order pancakes out--I usually find them dry, and restaurants almost never have real maple syrup. Thus, they're good for the "slow down" part of brunch, but closer to an every day food. Growing up my parents didn't make pancakes, they made crepes, which we called "clipes." We only ate them with maple syrup (which had to be real, no Mrs. Butterworth in our house), and they were a frequent weekend treat. The whole concept of savory crepes still kind of confuses me and I've yet to try them. Since I started cooking for myself (and DP) I've had to try to find my own "go to" pancake recipe. Crepes, unfortunately, are too eggy for DP. While that is something of a bummer, it has given me an excuse to experiment and go searching for the "perfect" pancake recipe.

I think I may have found my "favorite" pancake. It is moist, light, substantive (some pancake recipes, I have found, are too light), and has a great lemony flavor. I made these for DP's birthday and I look forward to enjoying them for many brunches to come.


Blueberry Lemon Ricotta Pancakes
adapted from Epicurious

4 lg eggs, separated
1 1/3 cups ricotta
1 1/2 tablespoons sugar
1 1/2 tablespoons fresh grated lemon zest
1/2 cup all purpose flour
blueberries
butter
maple syrup

In a medium bowl whisk together the egg yolks, ricotta, sugar and lemon zest. Add the flour, stir until just combined. In a separate bowl beat the egg whites with a pinch of salt until they form stiff peaks. Fold the egg whites into the ricotta mixture until combined. Melt a small pat of butter in a large nonstick skillet over medium heat until bubbling. Pour the batter into the skillet in 1/4 cup measures. Scatter blueberries into pancakes. Once you see bubbles forming on surfaces of the pancakes, flip (1-2 minutes per side). Cook 1-2 minutes more. Serve with maple syrup and extra blueberries.

Thursday, August 5, 2010

July

Wait, is it August already? I can't believe what a whirlwind summer it has been. Since we got back from traveling I have been cooking up a storm while trying to avoid the unbearable heat and humidity in the city. More to come, later.

Back to July. One of my favorite holidays used to be the fourth of July. Up until I was ten, my entire family would get together for what we called a Penny Sale. All of my relatives would bring dishes to share, and items that they thought others would like to win in the raffle. My Aunt Lorraine, an Avon lady, would bring a whole carload of Avon products and organize the sale. We would arrange all of the items on folding tables and tape a dixie cup nearby. Raffle tickets were sold in envelopes ($2 for adults, I think kids got a discount); you would use your numbers to "bid" on the items. For instance, an envelope might hold 50 slips of paper with the number 2 on them. If you really, really wanted the little keepsake box, you would put all 50 of your tickets in the cup for that item, increasing the chances that your number would get picked. Funny memory--when I was around five I asked my aunt if I could carry on the tradition of doing the sale when she died. She was probably in her mid-fifties at the time.

While the raffle went on, we would sit in lawn chairs, eating barbecue, eagerly anticipating hearing our number from the "caller." In between, cousins and siblings would play lawn games and swing on the swing set. The day would culminate in backyard fireworks--the best, if not the safest, of firework displays.

Family circumstances caused the Penny Sales to be retired some 20 years ago, and the memories of them are drenched in nostalgia. Now I associate July 4 with Cape Cod, and even if I only have a few days off (like this year) I brave the traffic and head up there. Usually the weekend is full of barbecues at various family friends' houses, complete with bocce tournaments and babies, and the best adult perk: wine. This year I was sick and my parents weren't there, so DP and I embarked on a quest to make some authentically summery/Cape Cod-y food. We steamed lobsters, grilled corn and chicken, and made time for ice cream sundaes.

Our lobsters were delicious, and easily made once you get over the whole "they must be cooked while alive" hump. We read that placing them in the refrigerator prior to cooking numbs the nervous system, so we did that. I'm not sure if they were numb or not, but I like to think they fought a little less than usual.

*love the little barnacle by mr. lobster's eye

Loose directions for cooking lobster:
Place a large (really large) pot on the stove, fill with 1-2 inches water mixed with 2 tablespoons salt and the juice of 1 lemon. Bring water to a boil, add the lobsters (1-2 lbs each). Cover, steam 12-15 minutes or until lobster shells turn bright red. Serve with melted butter, preferably on plastic plates printed with instructions on how to eat a lobster (see above).

On the fourth, because I was sick, we kept everything really simple. Grilled the corn, in the husk, no bells and whistles--just butter. Grilled the chicken, brushing with store bought barbecue sauce (Dinosaur) frequently. Grilled romaine lettuce, dressed in store bought balsamic vinaigrette. Drank wine. Ate ice cream, and made it to the beach for the amateur fireworks show. It was great. Not too many pictures, but here's one of the corn:

Tuesday, June 22, 2010

Even Better than the Real Thing

Another vacation, another salad week. This one a little more indulgent (the vacation, and the salad). We spent a week in San Francisco with family, and it was like a 'Best Of' tour of the city. I lived there for a while once upon a time, and the city as a whole holds a special place in my heart. We shopped, went to wine country, had a fire on the beach, and we ate. And ate. And ate. I'm needing a cleanse week now more than ever. Unfortunately, as soon as we got back I worked for 2 days and then we celebrated DP's birthday. So now it's salad week, one week later.

This salad I actually made a couple of weeks before we went on vacation. I liked the idea of the lightly sauteed lettuce, and all the components of the BLT except not in a sandwich (I'm not a huge fan of sandwiches). I really like grilled lettuce, and I wondered if lettuce cooked in another manner would be as appealing. It was! This was great--the chicken crispy, the salad wilty and delicious, and the mayonnaise a nice, citrousy accompaniment. I'll definitely be making it in salad weeks to come, and I'll be sharing this weeks salads in later posts!

*Photo courtesy of DP

Deconstructed BLT
from Bon Appetit

1/2 cup mayonnaise (I use canola oil mayo, you could certainly use low-fat for a lighter salad)
1 tsp minced fresh rosemary
1/2 tsp lemon zest
5 slices center cut bacon
4 large plum tomatoes, cut into 1/2 inch cubes
1 tsp ground cumin
1 5-ounce package mixed baby greens
1 tablespoon red wine vinegar
4 skinless, boneless chicken breast halves
1 cup panko

Mix first three ingredients in a small bowl, season with salt and pepper.

Cook bacon in a large nonstick skillet over medium heat until crisp, crumble and set aside. Add tomatoes and cumin to bacon fat, cook 2 minutes. Add greens, toss until just wilted, about 1 minute. Sprinkle with red wine vinegar, toss to blend, season with salt and pepper. Add bacon to greens.

Preheat oven to 400 F. Place panko in shallow dish, sprinkle chicken breasts with salt and pepper, press into panko to coat both sides. Place on jelly roll pan and cook in oven until meat thermometer reaches 165 F, around 35 minutes.

Divide greens evenly among 4 dishes. Top each with 1 chicken breast, and 2 tablespoons mayonnaise. I also had some extra roasted cherry tomatoes, so we threw those on top (roasted in 400 degree oven, tossed with olive oil and balsamic vinegar, for 20 minutes or until soft).

Monday, June 7, 2010

Hot and Heavy

It has recently gotten hot and humid in Brooklyn. Summers in New York are generally miserable (for me), but the thick, super hot days usually don't roll around until at least the end of June. So far this year we have already hit 90, and most days have been in the mid 80s with the humidity hovering around (or over) 70%. All of this makes me lazy, and while at the very least I have to show up at work and school, a lot of cooking has been falling by the wayside. DP and I have been eating out a lot--which hasn't been good for our wallets or waistlines. I need to re-fill my coffers with light, easy recipes that aren't much work when it's too hot to move.

This salad fits the bill: it's a salad, nearly always light; it has some of my favorite ingredients (avocado, miso, and cilantro); and a final treat--steak. Oh, and it comes together in about 40 minutes. I made this a couple of weeks ago when the hot weather started, and it was great. Of course today, after a long, hot weekend of traipsing all over the city (damned if I'm going to let the heat spoil my fun!) and buying presents for a very special someone, we went right back to going out to dinner. Ah, well...


Photo courtesy of DP

Beef and Red Pepper Salad with White Miso Dressing
from Bon Appetit

3 Tablespoons + 2 teaspoons vegetable oil
3 Tablespoons unseasoned rice vinegar
2 Tablespoons white miso
2 Tablespoons chopped, peeled ginger
1 garlic clove, peeled
1 1 1/4 lb flank steak (pretty sure I used hanger steak, which was just fine)
1 5-ounce container mixed baby greens (or salad greens of your choice--especially local!)
2 cups thinly sliced cucumber (unpeeled if Japanese/English hothouse, peeled otherwise)
1 lg red bell pepper, cut into strips
1 cup chopped cilantro
1 cup thinly sliced red onions
1 avocado, peeled, pitted and cut up

For the dressing:
Place 3 tablespoons oil, rice vinegar, miso, ginger and garlic in blender or food processor, pulse/blend until smooth. Set aside 2 tablespoons for the beef, reserve the rest.

Heat remaining 2 teaspoons oil in a large skillet over medium heat. Salt and pepper steak, brush one side with reserved dressing, and place dressing side down into the skillet. Brown on both sides, 3-4 minutes per side. Brush steak with some of the remaining dressing toward the end of cooking. When done, transfer to a cutting board and let sit for 10 minutes. Brush with remaining dressing. Slice thinly.

Place all greens in a bowl, toss with reserved dressing.* Divide evenly among 4 plates, topping with beef and avocado.

*There is only 2 of us, so I always only dress half the greens--otherwise they get soggy.

Saturday, May 29, 2010

The Easy Button

A couple of weeks ago I found myself in a meeting that I felt could have been avoided. The meeting took just five minutes and was going over plans that I already knew, yet I had to take the subway 45 hours to get there and then back home before going to work that night. When it was over, the woman said "Well that was easy--just like I pushed the 'Easy Button.'" And I thought 'if only.'

I have been trying to find the easy way out of certain daily routines lately. I used to enjoy long, sprawling afternoons to make complicated, time consuming recipes. It was fun for me--I talked at length about the Eric Ripert salad that took me 2 1/2 hours to make (and that would be all I ever ate if I had the time). I'm not quite sure what happened, but I haven't had that kind of time in months. And so, in between trying to find my way back to free time and continuing live my over-scheduled life, I have also been looking for some simple time savers. Trying to find the 'Easy Button' in my own life, if you will.

This dish, pasta with roasted tomatoes, accomplished exactly that. It came together in about 40 minutes (and I am one where, if the recipe says 30 minutes it usually takes me three times that), roasting the tomatoes deepens their flavor, and the fresh herbs brighten the dish. It's perfect for right now.


Pasta with Roasted Tomatoes and Goat Cheese
from Cooking Light

12 ounces uncooked whole wheat spaghetti
2 pints cherry tomatoes
3 tablespoons olive oil, divided
1 tablespoon red wine vinegar
1/2 tsp kosher salt
1/8 tsp crushed red pepper
1/4 cup chopped basil
1/4 cup chopped fresh flat-leaf parsley
3/4 cup crumbled goat cheese

Preheat oven to 450* F.

Cook pasta in dutch oven according to package directions, omitting oil. Drain, reserving 1/2 cup cooking liquid. Return pasta to dutch oven.

Toss cherry tomatoes with 1 tablespoon olive oil, red wine vinegar, salt and crushed red pepper. Bake in oven for 10-15 minutes, until softened (you'll hear them popping open in the oven--when most of them are open and there is some char in places, they are finished).

Add cherry tomatoes to pasta. Pour 1/4 cup reserved pasta liquid into tomato pan, scraping to loosen all the juices/browned bits, add to pasta. Add remaining oil to pasta, cook over medium heat, adding pasta water slowly, until whole mixture is glistening. Add herbs, top with goat cheese.

Tuesday, May 18, 2010

Here and There

Two weeks ago I finished my very intense spring classes. The material was concrete, grounded in research, and tangible. Today, I started my summer semester course, the first in the holistic part of my curriculum. The class is about the mind-body-wellness connection, and it most certainly leaves the concrete behind. For example, we watched part of a film about quantum physics today. One of the people in the film spoke about instances in which particles can be in two places at the exact same time. While I can't quite wrap my brain around such an abstract concept, I also can't help but find it appealing.

Recently, DP and I found out that two of our good friends in the city are moving across the country. Just before that, two other friends also moved across the country. As I look at the dwindling list of friends I have here (with an eye on the ever growing list of friends I have elsewhere), I find myself wishing that I could be in two places at once. If I could have one superhero power I'd want the ability to be transported anywhere, any time, instantaneously.

Sadly, I don't have that power. I do, however, have the ability to make a dish that transports. I wanted to use meatballs that I saw on one of my favorite food blogs to make an Asian spaghetti and meatballs dish. I followed her instructions almost exactly, but I put the meatballs over soba noodles, added some snow peas and used the dipping sauce as the pasta sauce. The winds of change are a'blowing, and this recipe is coming with me!


Asian Spaghetti and Meatballs
adapted from this recipe

1/3-1/2 cup panko
1 1/3 cups ground turkey
1 egg
1 tablespoon minced ginger
1 clove garlic, minced
1/2 tsp salt (scant)
1/4 cup chopped fresh cilantro
3 scallions, chopped
1 tablespoon low sodium soy sauce
2 teaspoons sesame oil
assorted vegetables (snow peas, haricot verts)
1 (8 oz.) package soba noodles, cooked according to package directions

Sauce
4 tablespoons low sodium soy sauce
2 tsp sesame oil
2 tablespoons lime juice
1 tablespoon water
1 scallion, chopped

Preheat oven to 500* F.

In a large bowl, mix together panko, turkey, and next 8 ingredients (through sesame oil), combining with your hands until just mixed. Shape into golf ball sized meatballs (I made about 14) and place on a baking sheet sprayed with cooking spray (or olive oil in a spray bottle, like I do). Bake for 15-20 minutes, until cooked through.

Meanwhile, heat 1 tsp sesame oil in a 10 inch nonstick skillet. Saute vegetables for 5 minutes, until crisp tender.

Combine all ingredients for the sauce, tasting to adjust seasonings.

When meatballs are done, place soba noodles on dish, place 3 meatballs atop noodles, top with vegetables and sauce. Enjoy!

Tuesday, May 4, 2010

Method

I love the farmers market. Love it. Last year, on the most perfect spring day in early May, I went to the market with the goal of filling my house with flowers. It was a rare Saturday off and the farmers market was bursting with people, flowers, and fresh produce. It was like heaven. And then, to add to the perfect day, I spotted Dan Barber with two assistants doing the shopping for his restaurant, Blue Hill. I couldn't resist the opportunity to find out what a chef-hero thought was the best looking produce that day, so I followed him. For about 45 minutes. He weaved through the people, stalls, and food like he owned the place, and I must admit that occasionally when he picked up something extra and asked for some for the restaurant (most stalls had pre-prepared orders for him) I came up right behind him and bought some too. Animated birds couldn't have made me happier.

When I came home from vacation a couple of weeks ago there were facebook and blog posts about peoples' amazing hauls over the weekend. Ramps, asparagus, spring greens--spring had arrived! I couldn't wait to get there. Monday morning, bright and early, DP and I grabbed some bags and headed out, eager in our anticipation. It was, to put it mildly, a disappointment. We set out with the mission: "Find stuff we haven't been eating all winter." Unfortunately, Monday at the farmers market is like a skeleton market. There aren't many stalls, and this particular Monday the only "new" vegetable was asparagus. It was the woodier, thick asparagus stalks, but I bought some anyway because I was so excited. Then I got some salad greens, cheese, eggs, carrots and beets (for the aforementioned carrot and beet salad). If it wasn't going to be spring yet, at least I could get some fun new products. Fortunately, later in the week I discovered Wednesdays at the market and since then all has been right with the world.

Later in the week I roasted the asparagus, placed it atop the greens with pork medallions and cheese, and made a red wine vinaigrette--and forgot all about my disappointment at the market. It was delicious!


Salad with Pork Medallions
*This is more of a method recipe than an actual recipe.

1 tsp olive oil
1 lb pork tenderloin
1 bunch asparagus
salad greens (in my house, enough for 2--leftover salad is almost never good, unless it's kale)
your favorite cheese, cut into chunks or crumbled (depending on what kind of cheese)
red wine vinaigrette (I know there are very good recipes out there with the ratios. I just can't be bothered to measure when it comes to dressing. All of this is to taste)
-red wine vinager (2 tablespoons?)
-good olive oil (1/4 cup?)
-1 tsp honey
-salt & pepper

Preheat oven to 400 F.
Heat oil in a large skillet.
Trim fat off pork tenderloin and slice into 12ish rounds. Place in skillet, being careful not to overcrowd (or they will steam, not brown). Cook until done, about 8 minutes, turning 1-2 times. Set aside.
While the pork is cooking, wash the asparagus and break off the ends (the asparagus will break at the point it starts to be tender, so it's best not to cut). Place on a baking sheet, drizzle with olive oil, salt and pepper. Shake it around. Bake at 400* for 15 minutes. Cut into 1 inch chunks.
Place the salad greens on individual plates, top with 3 pork medallions, cheese, and asparagus. Drizzle vinaigrette over salad and enjoy!

Sunday, May 2, 2010

Ode to Squid

Squid, when they are swimming, look like evil little demons heading to their master. Or hypnotized animals following the sirens' call. They swim in groups, all of their pointy little heads tilted in the same direction, and they move by fluttering their tentacles--all of this combining to look like they are being pulled by some magnetic force to their destination.

They are also beautiful. They have purple flecked skin that changes to golden brown for camouflage purposes. Every time we saw a group of squid while snorkeling on vacation I was mesmerized and found myself following them as they glided through the ocean. I also found myself wishing that we had splurged for the water case for the camera so I could snap pictures of the little guys.

My first memory of eating squid was in the third grade at science camp. We dissected them, pulling out the spine to write our names with the ink, and then cut them up and sauteed them for a little snack. I remember thinking it was rubbery, and, quite frankly gross. Of course, throughout the years I have had my fair share of fried calamari--sometimes quite good and often quite bad--but it wasn't until two years ago at Christmas that I started to think about squid as a fish to cook and enjoy at home.

My mother bought some un-prepped squid from her fish guy, and then had a "family project" during which we all learned how to clean the little guys for cooking. First, you pull off the wings, which helps you loosen the skin which you also pull off. Then, you reach inside and pull out the spine, and finally you open up the top and pop off the little beak. I started out the activity begrudgingly, but it was actually kind of fun to get my hands a little dirty and relive my science camp dissection days with a different purpose. Of course, the squid, tossed in an Italian vinaigrette with vegetables, was delicious.

This week at the farmer's market, my favorite fish market had squid for relatively cheap and I snapped up a pound without thinking about what to do with it (a rarity for this devout recipe/list girl). I also got ramps, asparagus, and whole wheat pasta. When I got home I saw this recipe and this recipe on Closet Cooking and I figured I could make a variation of the pesto and add the squid to the dish. It was delicious--full of spring flavor and slightly lighter than your average pesto.


*photo courtesy of DP

Whole Wheat Pasta with Asparagus and Ramp Pesto and Calamari
Pesto adapted from Closet Cooking
*I should note here that I don't really use recipes for pesto. I just throw things in the food processor, whirl it around, taste, and adjust for seasoning/texture. So I'll give my method here.

1 bunch ramps
1 fistfull of basil
3-4 tablespoons olive oil (the original recipe called for 1 tablespoon--maybe because I don't measure, my pesto was originally way too thick. I ended up pouring it through the food processor opening until I got the right consistency--I think it was about 3 tablespoons)
zest of 1 lemon
palmful of walnuts
lemon juice (to taste, and to help with the consistency so you can use a little less oil)
1/4 cup grated Parmesan cheese, to taste
salt and pepper to taste
3-4 spears blanched asparagus (from a bunch, use the rest with the pasta)

Place everything in the food processor and turn on, blending until you reach the desired consistency. I like mine a bit chunky.

For the pasta:
12 oz whole wheat pasta, cooked according to package directions
The rest of the bunch of asparagus, cut into 1 inch sections
1 lb squid, cut into 1/4 inch rings
1 tsp olive oil
salt and pepper to taste
1 cup asparagus and ramp pesto

1. Blanch the asparagus (place in boiling water for 2-3 minutes, until bright green, then remove and plunge into ice water).
2. Heat olive oil in a skillet, add the squid and a little salt and pepper, saute until opaque.
3. Place pasta in large bowl. Add asparagus, calamari, and pesto. Toss. Enjoy!

Wednesday, April 21, 2010

Life in the Fast Lane

As a nurse, I work 12 hour night shifts. I am also currently in school, and this semester I am in class two nights per week. As a result, I often feel like I am at the end of a sling shot being whipped around in circles as the days fly by. I usually start every semester bright eyed and bushy tailed, with all kinds of plans for how I will keep up with my work, forgo sleep for exercise, and keep up with my menu planning and cooking 4-5 times/week. Invariably, I fall behind. Delivery creeps back into the weekly budget, and fresh vegetables bought with visions of complicated (or even simple) dishes are thrown out as I fail to keep up.

I was at this point several weeks ago when spring break, that glorious week in March that makes me feel like everything might just work out, came around. For seven short days, I plugged away at my overdue readings, hit the gym, and caught up on housework. Oh, and I cooked. And with every dish, I felt like I was getting a little closer to my former self. And then it was over, and not that long after I found myself tossing all of the almost-turned vegetables together with some rice and lime juice and calling it dinner. Actually, that was just fine too.

Here's what I made back when I had my sanity:


Pork Tenderloin Medallions with Gorgonzola-Tomato Salsa
Adapted from Cooking Light

2 cups chopped tomato (I used cherry tomatoes)
1/3 cup minced red onion
1/3 cup chopped basil
2 tsp extra virgin olive oil
1/2 tsp kosher salt
1 lb pork tenderloin, cut into 12ish slices
1 tsp olive oil
salt and pepper to taste

Combine first 5 ingredients in a medium bowl. Set aside. Heat 1 tsp olive oil in large nonstick skillet. Sprinkle pork with salt and pepper. Add to skillet, cook 3-4 minutes per side, or until done. Divide evenly among 4 plates, top with salsa. Enjoy!

Monday, April 19, 2010

Responsibilities

In my house, we divide the cooking responsibilities like this: I do all the cooking and grocery shopping. I feel comfortable with this because my partner (DP) has really given it a good try. She cooked a special meal for our 6 month anniversary (oh so long ago!). It didn't end well. We tried the whole: "one night a week is your responsibility." We generally ordered take out. More recently, DP tried to cook some of her favorite recipes for her family over the holidays. I took this as a sign that she might be turning over a new leaf, but she assured me that it only confirmed her hatred of the activity.

It's fine, because I love to cook. Going to the supermarket is a favorite pastime, and nothing pleases me more than a refrigerator stocked with fresh ingredients, waiting to be turned into meals for the week. Still, every week, I ask: "Any requests from the store this week?" And invariably the response is either "Everything!" or, more usually, "No." Which is why, a couple of weeks ago, when I asked the same question and I got the answer "Portobello mushroom pizzas!" I was a little bit excited. Still, I wasn't quite sure what it meant. Pizzas with portobello mushrooms on them? No, it was explained. Portobello mushrooms as the crust, topped with sauce and cheese--like a english muffin pizza.

Amazing.

Portobello Mushroom Pizzas
recipe by DP
This is a very loose recipe. You can use whatever kind of sauce, cheese, or toppings you like. The amounts are approximate--I didn't measure.

4 portobello mushrooms, stems detached, chopped and reserved
!/4 cup tomato sauce (or more, as needed)
1/2 cup mozzarella cheese (low fat, if desired)
olives, toppings, etc

Preheat oven to 400 F. Place mushrooms on baking sheet and bake for 10-15 minutes, until soft and cooked through. Remove from oven and set aside.
While mushrooms are cooking, saute chopped stems in 1/2 tsp olive oil, adding salt and pepper to taste.


Top mushrooms with sauce, cheese, olives, and chopped, cooked stems.
Bake for an additional 5-10 minutes, until cheese is melted and bubbly. Serves 2. Enjoy!

Saturday, April 17, 2010

Vacation Rituals

When my family went on vacations, my mother would start packing months before our departure date. She would pull our suitcases from the attic, and we would get to go through our summer clothes and pick out our favorite items to wear while away. All the while, we'd be dreaming of warmer weather and our upcoming trip. We'd take inventory and sometimes buy a special "vacation outfit," carefully tucking it away so it would be fresh and new for our travels. Anticipation built with every packed dress, t-shirt, and bathing suit. This routine was, I'm sure, part of being organized and making travel with three small children slightly easier. As we did it more, it became our little vacation ritual, part of the experience of travel itself, and a way to begin the fun and daydreaming a bit earlier.

As I travel more and more as an adult, I am starting to develop little vacation rituals of my own. The pre-vacation pedicure (to start the relaxation a day early). Staying up almost all night before an early flight (to sleep better on the plane). And, the week of salad upon returning home. Salad week is less about prolonging vacation, and more about transitioning back to real life. Because as much as traveling is relaxing and fun and full of adventure and good food, settling back into day-to-day living recharged and with a refreshed attitude is what going away is all about.

I was just here:


for a week with my family celebrating my parents' 35th wedding anniversary. Coming back to the cold feels cruel and inhumane right now, and so to ease back into it we went out for dinner tonight and had one last Dark and Stormy. Tomorrow, though, I'm making this:


With it, I'm going to start the process of getting back into life, while hopefully maintaining some of the relaxed attitude that is so characteristic of island living.

Carrot and Beet Salad
adapted from Jamie at Home, Jamie Oliver

4 large or 8 small beets (golden, red, chiogga, or a mix)
1 bunch carrots, peeled and tops trimmed (I like to get the rainbow ones when I can find them)
1-2 tablespoons red wine vinegar, or to taste
1-2 tablespoons extra virgin olive oil
sea salt and black pepper
fresh herbs: rosemary, parsley, basil, and/or mint (or whatever else you have kicking around that needs to be used), roughly chopped

Preheat oven to 400 F. Roast beets using your favorite method. I alternate between wrapping them individually with foil and tossing them in the oven for 40-90 minutes (until soft when pierced with a fork), placing them in an inch of water in a pan and roasting for 40-90 minutes, or placing in a foil lined pan, covering with foil, and roasting for 40-90 minutes. With the latter you could add a few sprigs of rosemary to the pan for a nice flavor. Remove from oven and cool, peel and cut into approximately 1 inch cubes.

While beets are roasting, place carrots on a foil lined baking sheet, toss with 1-2 tsp olive oil, sprinkle with salt and pepper. You could also add some fresh rosemary. Place in the 400 F oven and roast for approximately 20 minutes, until softened (but retaining some crunch). Chop into roughly 1 inch lengths.

Place beets and carrots in a medium bowl. Add 1-2 tablespoons red wine vinegar, remaining oil, sea salt and black pepper to taste, and herbs. Adjust seasonings to your liking. Serve over mesclun, add goat cheese and chicken breast or pork tenderloin medallions for a main course.

Monday, March 29, 2010

Memory Lane

When I was little, I rarely remember eating out. Mostly, my mom cooked dinner every night and we ate at home, or she packed food and we took it wherever we were going (a thermos of chili at the local ski "mountain" topped with crushed potato chips was particularly loved). We did have a few favorites: the Italian place that served fried dough instead of a bread basket (yum!); the taco place that ran a two for one special one night a week; and Steve's, the pizzeria down the road.

I'm not sure if it was the prizes in little plastic eggs that came from the old-fashioned machines in the back, the familiarity of the fake-wood booths and dim lighting, or the cheesy, meaty pies, but the pizza at Steve's has always been that by which I judge all others. Even after I moved to New York City as a college freshman, I never was able to match the perfection that came out of that tiny hole in the wall. For nostalgia sake, and to see if I had been right all these years, I dragged a friend on a road trip a couple of years back. The pizza was exactly as I thought remembered it. It was nostalgia-filled, crispy-crunchy goodness and I am so glad I went. Mostly because after that I was able to let go of my perfect pizza and finally enjoy, without reservation, all the other pizzas I had been disappointed by over the years.

Soon after that trip I began making my own pizza at home. As much as I don't love baking I actually really like working with dough. I like the physicality of kneading, I like the change in texture as you work in more flour, and I love, LOVE, punching the dough down after the first rising (I don't care about all the recipes that say the step is unnecessary--I love it). And with pizza, I love the toppings. Mushrooms and olives, potatoes, ramps, asparagus, goat cheese, blue cheese...as I experimented, slowly, the pizza I made at home surpassed in my mind the memories of pizzas gone--a good thing, to be sure.


I don't have a specific recipe for most of the pizza I make. I usually use the dough recipe found here:
Epicurious
*edited to add: I use half white whole wheat flour in this recipe.

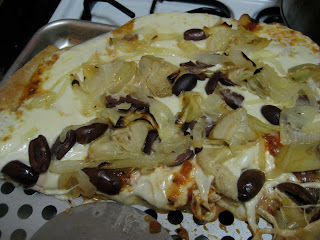
In the picture above I used artichoke hearts, caramelized onions, and kalamata olives with mozzarella cheese and tomato sauce. Here's my general method:
Make dough. Roll it out thin. Heat oven to 500 degrees. Put dough on upside down jelly roll sheets. Top pizza. Let sit for 15-20 minutes (so it will be more of a cross between thin and thicker crust). Place in hot oven and cook for 12-15 minutes, or until cheese is melted and bubbly and the crust edges are lightly brown. Slice and eat!

Wednesday, March 24, 2010

On the other hand...

This week at the grocery store, after scanning all of my items, the checkout worker asked me "So what's the pumpkin for?" "Huh?" I asked. "Well, it just seems like you are really into the whole, 'seasonal' thing, and I just had to ask what the pumpkin is for." "Oh, I was just really feeling a pumpkin cake this week," I replied. Which is odd considering the rest of my cart was full of the first local mustard greens of the season, carrots, and kale, and even more odd considering my on/off (mostly off) relationship with baked goods.

I have never been much of a baker. When I first started cooking, it was one of the things I was really bad at. Then, when I was in nursing school, my friends and I started something we called "Blue Bag Wednesdays." One day someone brought some treats to class in a sparkly blue bag to share with all of us. I had the idea to pass the bag from person to person, each one responsible for baking a tasty treat to share, ironically enough, during our Wednesday nutrition class. People got pretty competitive as the weeks passed. One brought mini pear tarts wrapped individually with parchment paper and tied with a flower bound in twine. Another, for Passover, brought cream puffs made without flour in honor of her Jewish father. I brought cookies. Every time I had the bag in my possession, I tried a different cookie recipe, often times bringing them in overcooked and burnt on the bottom, or undercooked and a little bit too chewy. I brought them in week after week to try to hone my skills a little bit, and by the end of the semester I managed to bring in a passable batch--lightly browned on the bottom, fully cooked, but still soft and chewy. I was pretty proud.

I've only baked a little bit since then, and when I do it's not usually for myself. Until this week. When the pumpkin cake with cream cheese frosting recipe that I clipped last wall called out to me. And I decided I could make an "every day" cake. Something to have a piece of, just a little, after dinner. And remember that while March this year may be mild, the nights are still chilly and it's not quite summer.


Pumpkin Cake with Cream Cheese Frosting
from Cooking Light

Cake:
2 1/4 cups all purpose flour
2 1/2 teaspoons baking powder
2 teaspoons cinnamon
1/4 teaspoon salt
1 cup packed brown sugar
1/4 cup butter, softened
1 teaspoon vanilla extract
2 large eggs
1 (15 ounce) can pumpkin puree
cooking spray

Frosting
2 tablespoons butter, softened
1/2 teaspoon vanilla extract
1 (8 ounce) package low fat cream cheese
2 cups powdered sugar

Preheat oven to 350 F.

Combine flour through salt in a medium bowl, mix with a whisk.

Combine brown sugar, butter and vanilla in a large bowl, mix well with a mixer at medium speed. Add eggs, one at a time, beating well after each addition. Add pumpkin, mix well. Fold in flour mixture until just combined. Bake for 25 minutes, or until a wooden pick comes out clean. Cool completely on a wire rack (or in the pan, like me, because I don't have a wire rack).

For the frosting, combine the butter, vanilla and cream cheese in a medium bowl, beat with a mixer at medium speed until combined. Add sugar, one cup at a time, beating until well combined. Frost cake.

Serves 24 (Cooking Light servings, or 16ish regular servings).

**I just read the reviews of this on the Cooking Light website, and people were pretty harsh. I liked it in all its dense glory (like I said, I'm not a baker), but maybe next time I'd add a little more cinnamon and maybe a dash of nutmeg and/or cloves to up the spice factor in the cake.

Out like a lamb?

Right around the start of this month, I found myself braving the elements while making my way toward Chelsea Piers to play golf (a decidedly warm-weather endeavor). I didn't know at the time that the rain and wind that night would turn into one of the worst rainstorms the east coast has had in recent history, but I did know that I was cold, wet, and annoyed with the weather. Still, there was something romantic about watching the golf balls sailing out toward the Hudson River, the driving range lights illuminating the rain as it pounded left and right with the wind. Even so, after a beer (or two) at the attached brewery, as we were walking toward the subway against pelting rain, I grumbled "March better go out like a lamb!"

Looking at the forecast for the next two weeks, I may actually get my wish this year. Of course the predictive value of two-weeks-in-advance weather is limited at best, but I'm choosing to be optimistic. And, I might add, I'd like to think I've had something to do with our mid-March 70 degree days. I've long believed in my ability to "train the weather." Every year when spring arrives I retire my winter coat, wear t-shirts and skirts around the house (and more appropriate layers outside, although I used to parade around in tank tops in March when I was in college), and lately, I have begun to eagerly scour the grocery store shelves for the first local, seasonal produce. Last year I discovered ramps, and spent the rest of early spring discovering different recipes to use them in. One of my favorites was this ramp and sausage risotto. For me it was the perfect "bridge food." Still good hearty warmth for a chilly March night, but incorporating a breath of fresh air, or spring, to bring me into the new season.


Ramp and Sausage Risotto
(mildly adapted from Bon Appetit)

2 tablespoons butter
1/2 lb hot Italian sausages, casings removed
12 ramps, sliced, bulbs and thin stems separated from green tops
1 cup arborio rice (although since I made this I have been experimenting with barley and farro risotto--I think those would be great too)
1/2 cup dry white wine
3 cups fat free, low-sodium chicken broth
1/2 cup pecorino romano cheese, grated, plus additional for passing

Melt butter in a heavy large saucepan over medium heat. Add sausage, cook until no longer pink, breaking up with spoon, about 5 minutes. Add ramps, saute until almost tender, about 2 minutes. Add rice and stir 1 minute. Add wine, simmer until liquid is absorbed. Add chicken broth, 1/2-1 cup at a time, simmering until liquid is absorbed before adding more. Stir almost constantly. Continue cooking until rice is tender and risotto is creamy. Mix in green tops and cheese, season to taste with salt and pepper. Serve with extra cheese. Serves 4.